
Are you new to Notion and feeling a bit overwhelmed by its endless possibilities? Don’t worry; you’re not alone. Notion is a powerful tool with a bit of a learning curve, but with the right guidance, you can unlock its full potential. In this beginner’s guide, we’ll walk you through the essential steps to start using Notion effectively.
I’m Mr. Pugo, a Product Designer and Digital Creator specializing in crafting solutions to real-world problems using Notion. My expertise is channeled into creating efficient Notion Templates that simplify your life. While I’ve authored various Notion guides and tips in the past, I genuinely believe that the one you’re about to dive into is the epitome of usefulness, organization, and simplicity. So, without further ado, let’s embark on this journey and master Notion together.
Getting Started with Notion
A Step-by-Step Beginner’s Tutorial for Notion!
Hey there, eager learner! 🚀 Welcome to the world of Notion, where organization meets creativity, and productivity soars to new heights. In this section, we’re kicking things off with the essentials to get you up and running smoothly.
Introduction to Notion: Unleash Your Potential
Picture Notion as your digital Swiss Army knife, but instead of tiny gadgets, it’s packed with tools to make your life more organized, productive, and simply put, better. Whether you’re a student, professional, business owner or just someone looking to make life easier, Notion can benefit you in countless ways.
Creating Your Notion Account: Let’s Dive In!
Okay, now that you’re curious about the possibilities, let’s get you set up. We’ve got your back with step-by-step instructions on how to sign up and access Notion. It’s as easy as pie, and you’ll be amazed at what’s waiting for you on the other side.

To begin, simply click on the ‘Log In’ button. From there, you can either enter your email or opt for the convenience of ‘Continue with Google’ or ‘Continue with Apple’ buttons.
If you select the email option, just enter your email address, and Notion will promptly send you a signup completion email.
Tour of the Notion Interface: Your Digital Playground
Now, here comes the fun part! It’s like stepping into a new city; you want to know where everything is. In the world of Notion, we’ll take you on a guided tour of the workspace and introduce you to all the cool elements that make Notion a true game-changer.
So, are you ready to dive into the world of Notion and discover how it can make your life simpler, more organized, and more productive? Let’s roll up our sleeves and get started! 🌟
Building Your First Notion Page
Awesome, you’ve taken your first steps into Notion, and now it’s time to build your very first page. 🌟 It’s like crafting a digital canvas where your ideas and creativity can shine. In this section, we’re going to show you how to get started with your Notion pages.
Creating a New Page: Your Blank Canvas Awaits
Imagine a fresh, blank page just waiting for your ideas to fill it. That’s exactly what creating a new Notion page feels like! We’ll walk you through this step-by-step, so you can confidently start your first digital masterpiece.
To effortlessly create a new page, you can type ‘/’ in Notion on your PC or laptop, or on mobile, simply tap the plus button, select ‘Page’ and you’re good to go!
When you create a Notion page, the platform instantly opens the newly created page for you, allowing you to start immediately.
Text Editing and Formatting: Your Words, Your Way
Words are your tools for expression, so let’s master them. In this part, we’ll show you the basics of adding and formatting text in Notion. Bold, italics, lists – you’ll be a text ninja in no time!
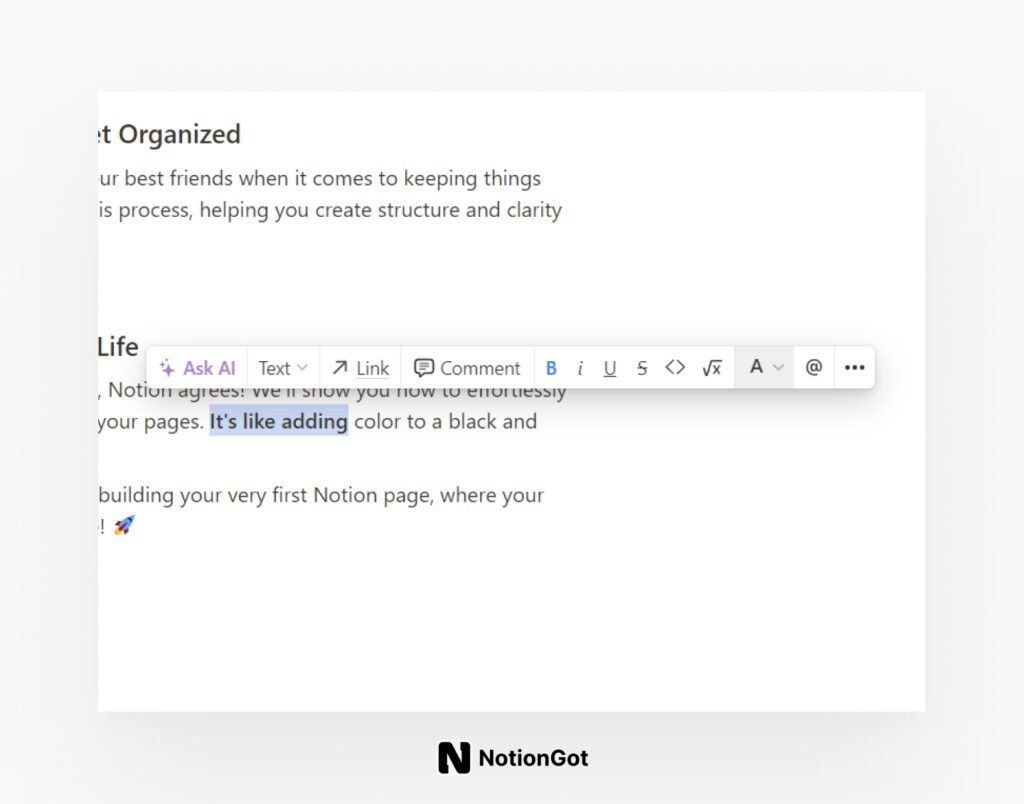
Let’s get those creative juices flowing! Once you’ve started writing, you can choose to select either a portion or your entire paragraph. This action triggers Notion’s text tools, ready to assist you further.

From this point, it’s all about tailoring your text to your liking. You get to pick the settings and edit the way you want your text to appear. For instance, if you wish to make your text bold, simply select the desired text and click ‘B’ in the toolbox, or use your keyboard shortcut by hitting Ctrl + B, and voilà!”

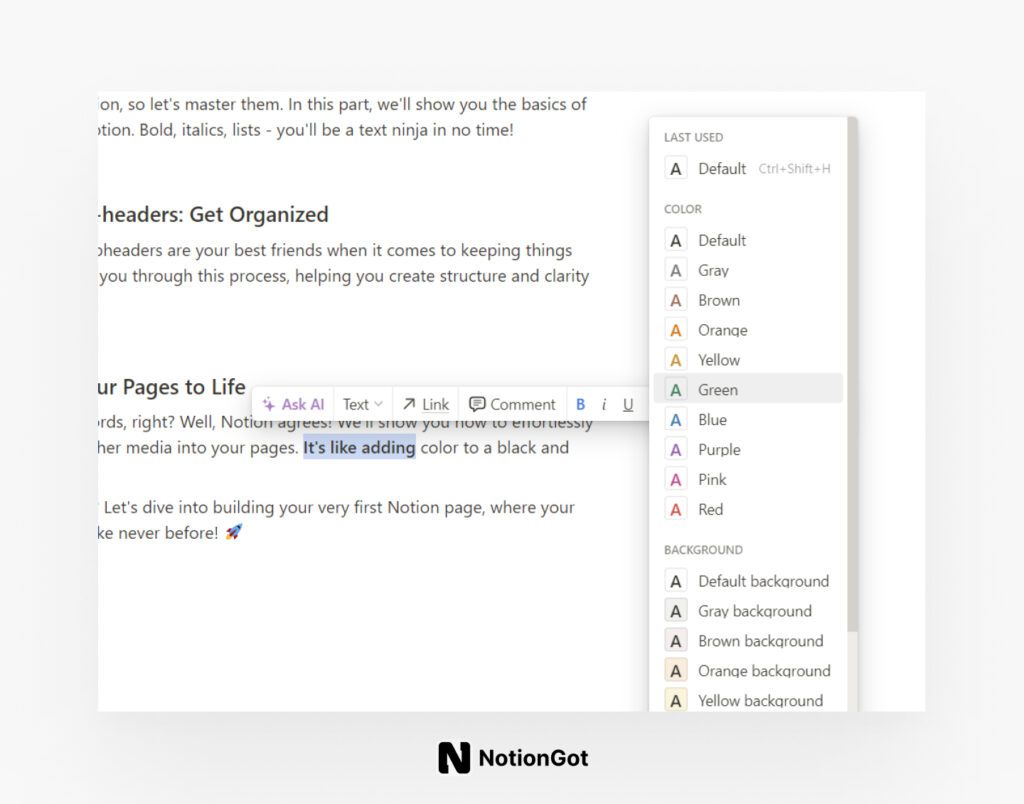
Now, if you’re looking to infuse some color into your text, it’s a breeze. Just head to the text color option in the toolbox and choose your preferred shade.
P.S. Wouldn’t it be great if Notion added the ability to use custom colors with HEX codes and RGB values? Here’s hoping for that feature!
As you’ve seen, the toolbox offers a wide array of text styling options to spruce up your content. You can make text bold, italicize it, underline it, strike through it, and even apply code effects. Not to mention, you can also add quotes, bullet lists, numbered lists, and more to make your text truly shine!

Here’s a handy trick for creating bullet or numbered lists quickly. To create bullets, simply type ‘- + space’, and for numbered lists, type ‘1 + space’. These shortcuts work like magic to instantly generate your list. And when you hit ‘Enter’, the list continues seamlessly below.
But what if you want to return to your regular text after the list? Easy! Just double-tap ‘Enter’ on your keyboard, and your content will resume without any list formatting.
Adding Headers and Sub-headers: Get Organized
No more chaos! Headers and subheaders are your best friends when it comes to keeping things organized in Notion. We’ll guide you through this process, helping you create structure and clarity in your digital domain.
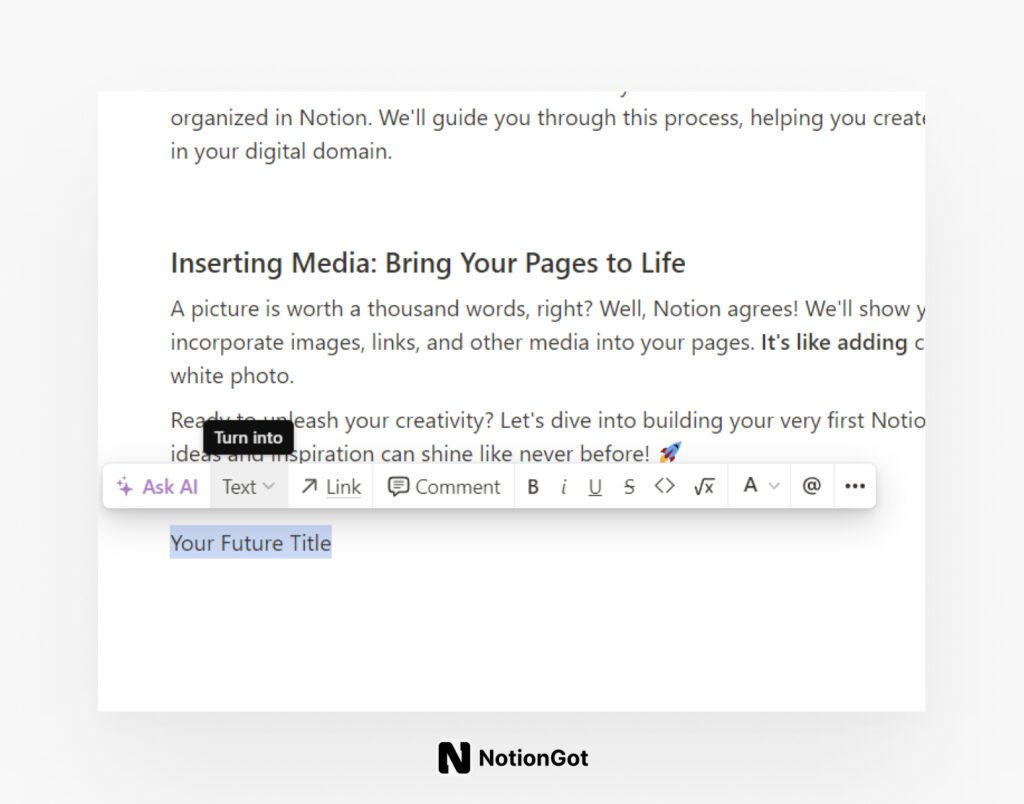
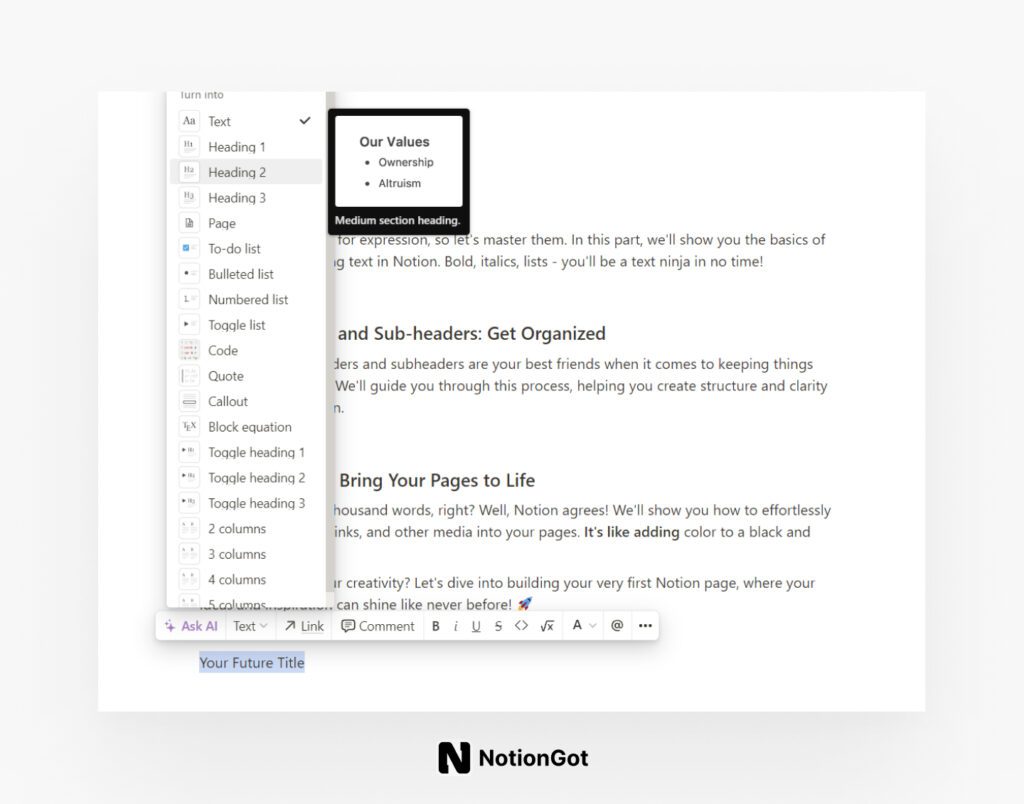
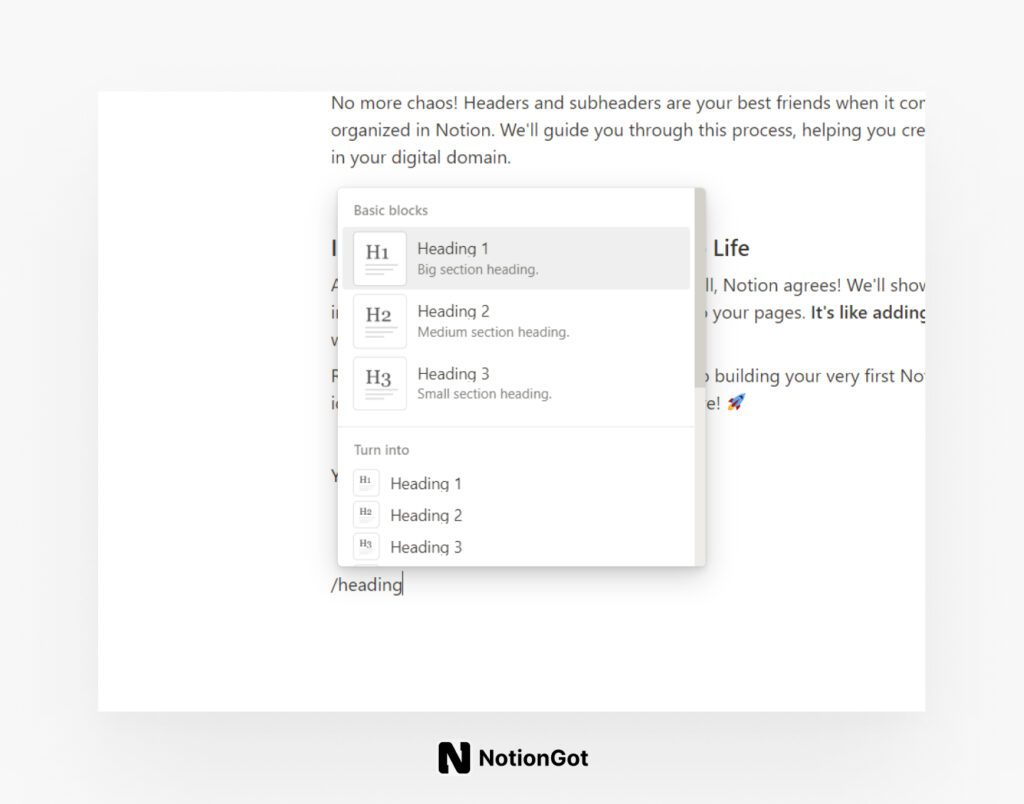
So, you’re keen on adding headers and subheaders to your text in Notion. Here’s how you do it: Simply select the text or paragraph you wish to turn into a header, then go to the ‘Text’ dropdown. From there, pick one of the three heading options – Heading 1, Heading 2, or Heading 3. These headings can be used hierarchically to neatly organize your text into different levels of importance.
For instance, you can use H1 for your main headings, H2 for subheadings under H1, and H3 for subheadings under H2. It’s a fantastic way to keep things structured.
And here’s a nifty trick: If you don’t have any text to turn into a heading yet, you can simply start typing ‘/heading’ right where you want your new heading. This is a handy Notion shortcut that saves you the hassle of selecting headings from the toolbox – I find it quite convenient!”
Inserting Media: Bring Your Pages to Life
A picture is worth a thousand words, right? Well, Notion agrees! We’ll show you how to effortlessly incorporate images, links, and other media into your pages. It’s like adding color to a black and white photo.
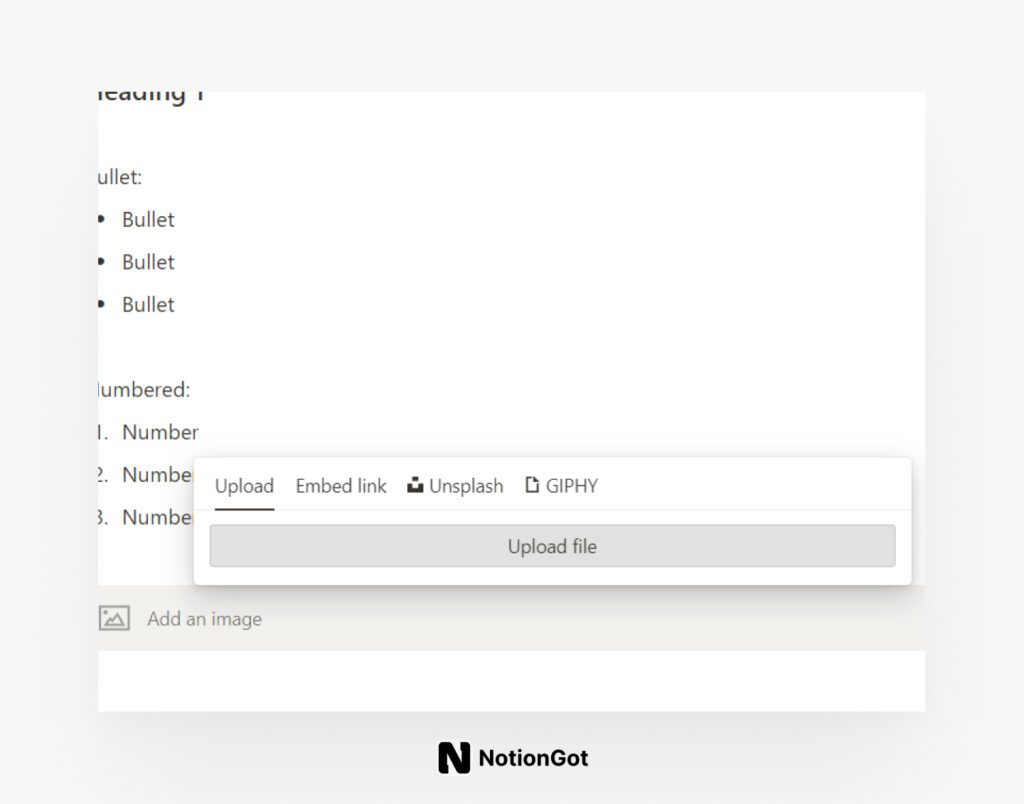
Check out the image below for a visual guide. To insert media, simply type ‘/’ or click the ‘+’ icon. You’ll then be prompted to choose the type of media you want, whether it’s an Image, bookmark, Video, Audio, or File. You can select a file from your laptop or mobile folders, or you can leave it empty for later use if you don’t have the file ready at the moment.

Personally, I find using the drag-and-drop or copy-paste methods most convenient. These methods let me effortlessly bring media from my laptop, mobile device, or the web without the need to manually specify the media format using Notion’s toolbox.
Organizing Information in Notion
Alright, you’ve got the basics down, and now it’s time to kick things up a notch! In this section, we’re diving into the nitty-gritty of how to effectively organize your information in Notion.
Understanding Databases: Your Data’s Best Friend
Ever wish you could have your own superpower for organizing information? Meet Notion databases! Think of them as the superheroes of structured data. We’re going to unravel their superpowers and show you how to use them to keep your information organized and easily accessible.
To explain this in the clearest way possible, I’ll utilize one of my well-structured Notion Templates: the ‘Getting Things Done’ (GTD) Notion Template.
Within this GTD template, I’ve built a comprehensive database with multiple layers and sublayers, seamlessly accessible across more than 10 Notion pages. The magic lies in its ability to streamline data management.
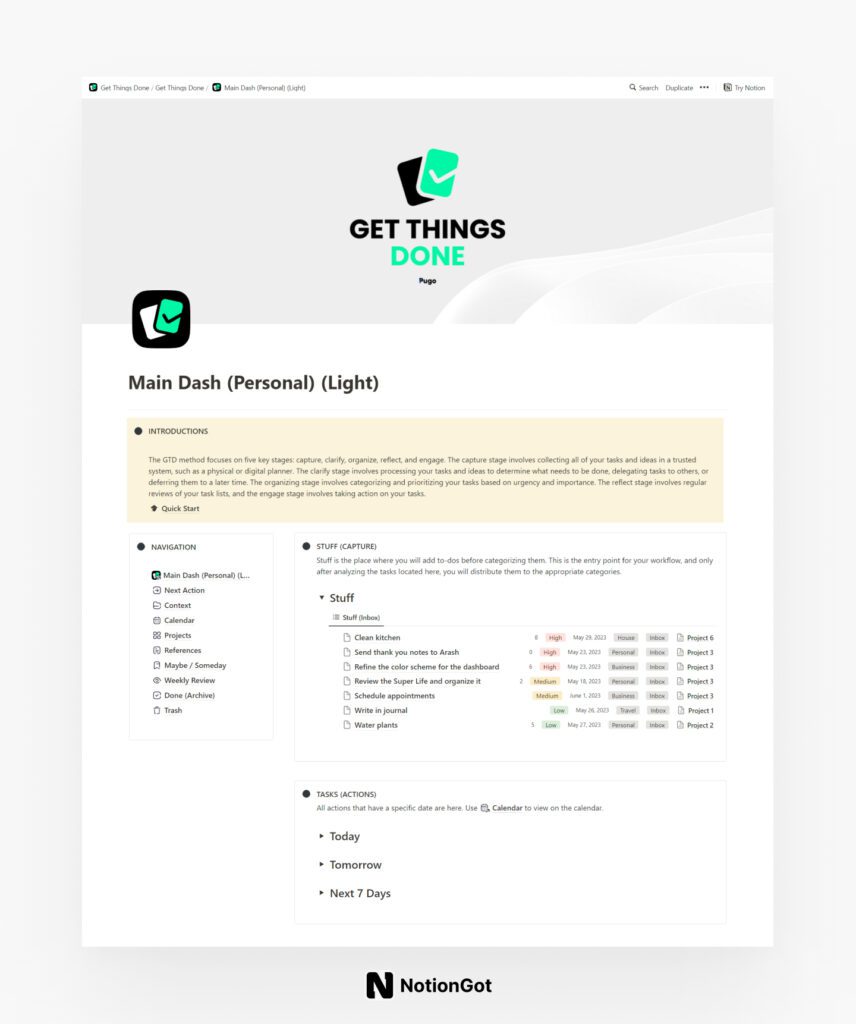
With this GTD template, I’ve created a central database that serves as a hub for capturing and organizing everything. No more manual updates across various pages and databases.
For instance, I can effortlessly shift items from the ‘Stuff’ section to ‘Tasks,’ ‘Next Action,’ ‘Context,’ ‘Calendar,’ ‘Project,’ ‘References,’ ‘Maybe / Someday,’ ‘Trash,’ and more, simply by adjusting the List tags. Let’s delve deeper.
Creating your Notion database

Building your Notion database is a breeze! Just type ‘/’ where you want your database, then follow with ‘database.’ It should look like this: ‘/Database.’ Choose ‘Database – Inline,’ and you’ve successfully created your first Notion database.

In your database, you can include a wide range of elements: formulas, text, numbers, URLs, checkboxes, files, dates, tags, and much more. I’ll provide a detailed guide on how to do this in the upcoming section, ‘Creating Tables: Where Data Comes to Life.'”
Creating Tables: Where Data Comes to Life
Tables might not sound exciting, but trust me, they’re the lifeblood of organized information. I’ll take you step by step, so you can create tables like a pro. It’s like setting up your very own data command center.
So , in the database section we have created our table database.
Now, let’s add some content and details to our database. If you’ve ever worked with Excel, you’ll find this step quite intuitive. Databases are essentially tables, and tables are databases – I’ll elaborate on this in a later section to avoid any confusion.
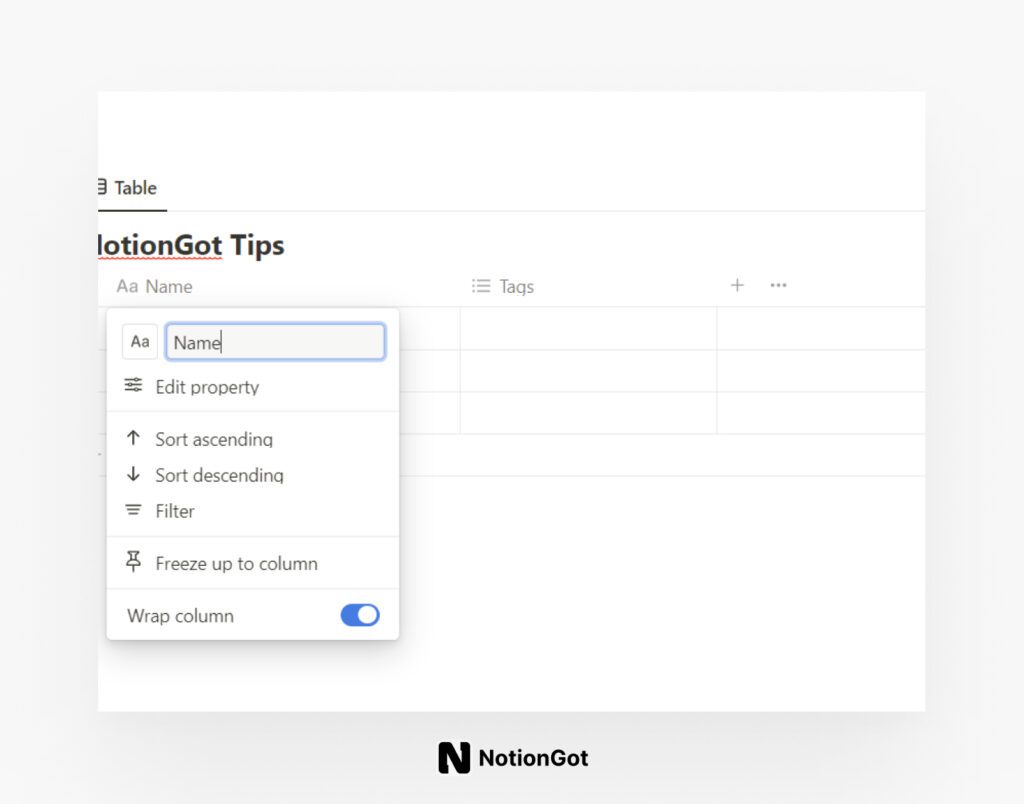
When you click on each column name, a handy dropdown menu appears. From here, you can edit the properties, freeze the column to keep it in view while scrolling horizontally (a lifesaver for large databases with many columns), and filter or sort everything within that particular column. But for now, let’s keep it simple and just change the name of the column. Let’s call it ‘Tasks!’
Create To-Do List, Task and Project Management in Notion
Alright, let’s get down to business! 📈 In this section, we’re diving deep into the world of task and project management in Notion. Whether you’re tackling personal to-do lists or handling big projects, Notion has your back.
We all know the feeling of having a million things to do. Notion’s to-do lists, task and project management are like your personal task ninja. We’ll show you how to create and manage them effectively so you can conquer your day like a pro.
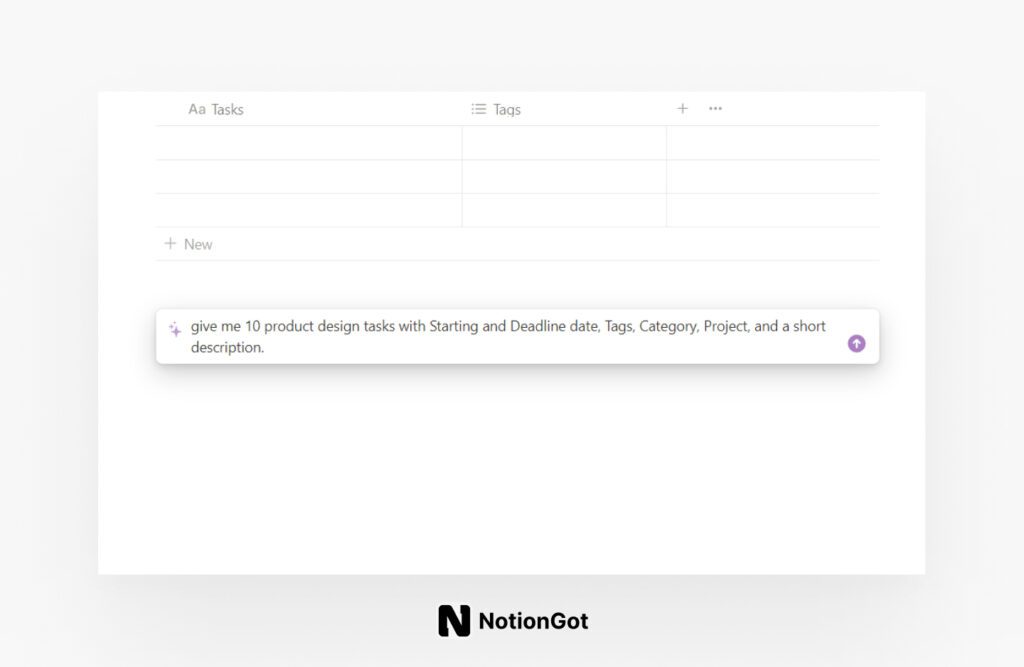
Now, let’s sprinkle in some imaginary tasks so that we’re not left with an empty canvas. I will ask Notion AI to give me 10 tasks with Starting and Deadline date, Tags, Category, Project, and a short description.
Now that I have my list of tasks, it’s time to create additional columns for date, tags, categories, projects, and descriptions. To do this, simply use the Plus Icon.

From there, you just need to choose the right type of property for each column. For example, select ‘Text’ for the description, then click the + icon again and opt for ‘Select’ for the category column. Continue this process by choosing ‘Multi-select’ for the tags column, and so on.
Additionally, we need a progress tracking feature for our task management table. Repeat the process and select ‘Status’ for the progress property. Lastly, I’ll demonstrate how to create a linked project column, making it even more useful and synchronized with real-world project management.
Now, we have something like this:

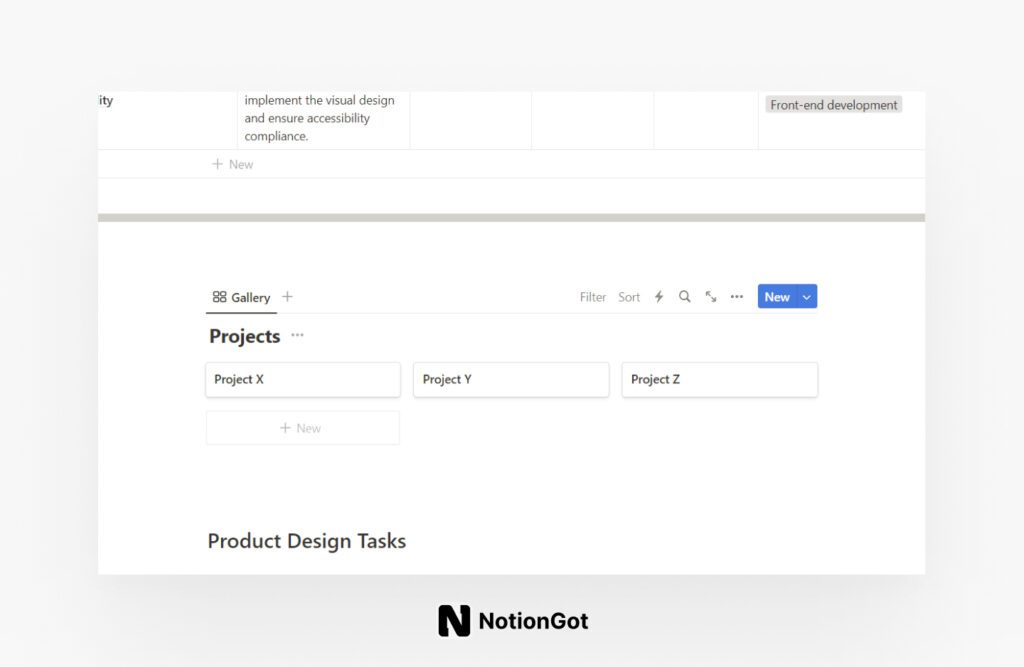
All right, now let’s dive into some of the magic of Notion databases that I’ve been telling you about. To set up a proper projects column, we need to create a new database specifically for projects. This step will enable us to establish connections between the two databases later on.
Step 1 is all about creating a brand-new database specifically for projects. In this case, I prefer using the Gallery layout for the project database. This layout allows us to neatly store everything related to each project in one designated slot. It looks something like this:
Now, for the second step: linking the project dashboard to the tasks dashboard. This linkage enables us to mention each project right within the tasks section, eliminating the need to constantly switch between these two databases whenever we want to access project details.
To make this happen, you’ll need to add a new property to the tasks table. Select ‘Relation,’ then choose the ‘Projects’ Database. And just like that, your two databases are now connected.


Now we have a new property added to our table, like this:

From here, we only need to select the related project to the row of each tasks wo our tasks will be connected to their main projects. for doing this, you only need to click on project row for each row. The result:

The beauty of this is that you’re not confined to merely mentioning the project associated with a selected task. Instead, you can link it directly to an actual project. This capability greatly enhances your project management dashboard, making navigation between sections and links incredibly easy, just as I demonstrated with the GTD template earlier in this post.
So, there you have it – a task and project management system along with a simple To-Do List, all right here in Notion. What are your thoughts on these features? The exciting part is that with Notion, there are no limits. Your only boundary is your creativity, and you can take your organization and productivity as far as your imagination can reach.
Create Your Notion Projects Kanban Boards: Visualize Your Workflow
Ever wish your tasks could be as organized as a neatly arranged deck of cards? With Notion’s Kanban boards, they can be! Learn how to use this visual feature to manage your tasks and projects with ease.
If you’re looking to create a Kanban view for your tasks and projects, just follow these simple steps: Click on the ‘Table’ tab, then select ‘Duplicate’ to make a copy of your tasks table.

Now, let’s give this new tab a name that suits its purpose better. Change it from ‘Table’ to ‘Kanban.’ Additionally, click on the ‘Layout’ link and select ‘Board’ for the ideal view.

Now, you have your shiny new Kanban board, built on all the data you had in the Table. The final touch is to decide how you want to group your Kanban. To do this, head to the ‘Layout’ tab, and at the bottom, you’ll find ‘Group by.’ Within the ‘Group’ tab, once again, open ‘Group by’ and select how you want to structure and design your Kanban board. You have the freedom to group by Projects, categories, tasks, deadlines, or anything else that suits your needs. Personally, I’ve opted to group mine by Projects.

If you prefer, you can hide the ‘No Projects’ column.

Ta-da! And here’s the result – presenting our brand new Kanban board:

Using Templates: Your Shortcut to Success
Why start from scratch when you can have a head start? Notion’s templates are your secret weapon. I’ll teach you how to use pre-made templates to save time and effort or create your own templates tailored to your unique needs.
Get ready to take your organization skills to a whole new level. We’re about to dive deep into the world of Notion databases, tables, and templates, where your information becomes a well-oiled machine ready to work for you. 📊✨
Project Management: Your Guide to Success
Projects can be a bit like juggling, right? But with the right tools, you can keep all those balls in the air. We’ve got tips and tricks for managing projects, tasks, and deadlines in Notion, so you can be the master of your project universe.
Ready to boost your productivity and conquer your tasks and projects with finesse? Let’s dive into the world of Notion’s task and project management, where your to-dos become achievements, and your projects become successes! 🚀📋
Collaboration and Sharing
Now that you’ve got your Notion groove on, it’s time to take it up a notch and collaborate with others. 🤝 In this section, we’re going to explore how Notion makes teamwork a breeze.
Inviting Collaborators: Teamwork Makes the Dream Work
They say two heads are better than one, and Notion wholeheartedly agrees! Learn how to invite team members and work together seamlessly. We’ll show you how to create a collaborative space where ideas flow and projects thrive.
Sharing Pages: Let’s Share the Magic
Your Notion pages are like treasures, and sometimes, you want to share them with the world. We’ll guide you through the process of sharing your Notion pages with others. Whether it’s colleagues, friends, or the entire internet, we’ve got you covered.
Version History: Keep Tabs on Changes
Ever had that sinking feeling after accidentally deleting something important? Notion’s got your back with version history. We’ll show you how to track changes and revisions, so you never lose valuable work again.
Get ready to level up your collaboration game and share your Notion brilliance with the world. Together, we’ll make teamwork a piece of cake and ensure that your Notion pages are always in tip-top shape. 🙌🌟
Advanced Notion Tips
You’ve come a long way on your Notion journey, and now it’s time to dive into the exciting world of advanced tricks and techniques. 🚀 In this section, we’re going to unlock the full potential of Notion.
Notion Integrations: Supercharge Your Workflow
Notion loves playing well with others! Discover third-party integrations that can seamlessly enhance your Notion experience. We’ll guide you through the process of connecting Notion with other tools, making your workflow smoother than ever before.
Creating Custom Templates: Your Unique Notion Playground
Why settle for ordinary when you can have extraordinary? Learn how to design custom templates tailored precisely to your needs. With these personalized templates, you’ll have the power to transform Notion into your digital playground.
Advanced Database Techniques: Organize Like a Pro
Databases are your secret weapon for supercharged organization. We’ll delve deep into advanced techniques that will take your data organization to the next level. From complex filtering to powerful sorting, you’ll become a data wizard in no time.
Get ready to become a Notion pro! With these advanced tips and tricks, you’ll have the tools to make Notion dance to your tune, turning it into a customized, supercharged powerhouse for your specific needs. 🌟✨
Troubleshooting and FAQs
Hey there, it’s perfectly normal to encounter a few bumps on the Notion road. But fear not, because in this section, we’ve got your back with solutions to those pesky problems, and answers to all your burning Notion questions. 🛠️🔥
Common Issues: We’ve Been There Too
Sometimes, even the best of us run into roadblocks. In this part, we’ll tackle the most frequently encountered issues head-on. From syncing problems to formatting quirks, we’ve got solutions to keep your Notion journey smooth.
Notion FAQs: Your Questions, Answered
Curious about something? Chances are, others have wondered the same thing. In this section, we’re answering your most pressing Notion questions. From the basics to the intricacies, consider this your Notion encyclopedia.
With these troubleshooting tips and FAQs, you’ll be armed with the knowledge to tackle any challenge that comes your way in the world of Notion. So, let’s get those problems solved and those questions answered! 💪📚
Taking Your Notion Skills Further
Congratulations, you’ve journeyed through the Notion wonderland! 🎉 But guess what? There’s still more to explore. In this section, we’re going to guide you on how to take your Notion skills to the next level.
Notion Community: Your Digital Tribe
Feeling like you want to connect with fellow Notion enthusiasts? Join the Notion user community! It’s a vibrant space full of inspiration, tips, and help when you need it most. Together, we’re a force to be reckoned with.
Notion Mobile: Unleash Notion on the Go
Life moves fast, and so should your Notion. We’ve got tips and tricks for using Notion on your mobile devices, so you can stay productive and organized no matter where you are.
Advanced Use Cases: Let Your Imagination Soar
Ready to get creative? Discover the incredible and unexpected ways people are using Notion. From journaling to recipe collections, Notion’s versatility knows no bounds. We’ll open your mind to endless possibilities.
So, let’s keep this Notion adventure going! By diving into the Notion community, mastering mobile, and exploring advanced use cases, you’ll become a Notion wizard in no time. There’s always something new to learn and explore, so let’s keep the Notion magic alive! 🌟🚀
Your Notion Journey Begins
Congratulations, you’ve reached the end of this beginner’s guide to Notion! 🎉 But guess what? This is just the beginning of your exciting Notion journey.
Next Steps: Embrace the Notion Magic
Now that you’ve dipped your toes into the vast sea of Notion, it’s time to dive in headfirst! Continue exploring, experimenting, and using Notion effectively. Don’t be afraid to get creative and make Notion your own. The more you use it, the more you’ll discover its true potential.
Get ready to transform the way you organize your life, collaborate with others, and work toward your goals. By the end of this guide, you’ve gained the confidence to navigate Notion’s features and customize it to fit your unique needs.
So, what are you waiting for? Let’s embark on this Notion journey together! 🌟🚀 Whether you’re a student, a professional, an artist, or an entrepreneur, Notion has something incredible to offer you. Your digital adventure begins now, and the possibilities are endless. Enjoy the ride!